|
|

|
|
All use of my digital work is covered by this
Creative Commons Deed.
Please do not use any of my work for commercial purposes, thank you. |
|
|
|
|
Creating Terrain (6 of 7)
|

|
|

|
|
|
|
|
 |
|
|
|
 |
|
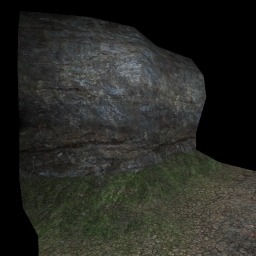
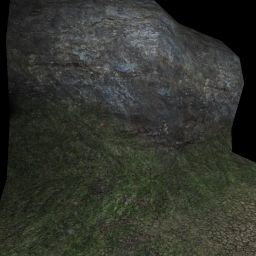
Not all terrains are rolling hills and sweeping flat plains of land. Sometimes the
landscape needs to be more vertically with cliffs and over hanging ledges.
DotProduct2 can cope with vertical brushwork but it will need a different texture projection
shader. This can get messy to implement but luckily there is another way.
First create a rockwall template as discussed in a previous article called
Rockwall Corridor. Once happy with the template,
duplicate it along the edge of the existing terrain like the image to left shows.
A good example of decal blending would be to fade the floor terrain into the bottom of the
rock wall face so that the two materials don't look so clean and tidy.
|
|
|
 |
|
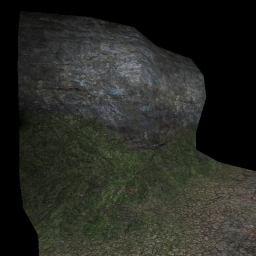
First take a copy of the bottom row of the rockwall brushes and hide all the other
brushwork in the map so its easier to see what is going on. (Press Inverse and Hide)
Paint all the new brushes with a nodraw shader and then paint the front
faces with the decal blend shader.
Create an alpha fade brush (0%) for all the top vertex points and groups all the brushes
together into a func_group entity.
To add more variety to the blend shape either add more brushes from above the current row
or cut the top part of the existing brushwork into more varied shapes.
|
|
|
|
|
 |
|
|
|
|
|
|
|
|
|
|
 |
|
The major drawback to decal blending is the creation of all the duplicate brushwork
and the possibility of zfighting occurring from a distance. Zfighting happens when
the engine draws two different surfaces on top of each other and displays random
parts from each at the same time.
For areas which require large amounts of blending it is more efficient to create
an unique blend shader than using a decal blend. A unique shader would involve
fewer layers for the graphic card to draw and is less likely to produce zfighting
issues.
By creating a similar shader to the floor terrain, but without the ivector or DotProduct2
shader components, the alpha channel can be fine tuned to whatever blend that is required.
|
|
|
 |
|
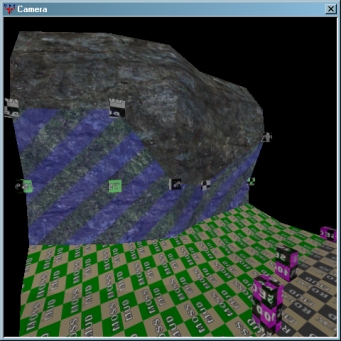
The editor image for the new shader needs to be the same (X,Y) dimensions as the textures
being used for blend. To make the blended areas easily recognizable in the editor it is
worthwhile using one of the blending textures as a background image and
then tinted it a different colour.
All texture alignment of the blend is done within the editor and not from the shader.
This is why it is worthwhile using one of the blending textures as a background image,
so that the blended areas can easily be aligned with existing textures.
By default the alpha channel value on all of the vertex points is 100%. (Secondary)
If creating a transition blend, (like in the image to left) the Alpha Fade brushes
only need to be setup on one side of the blend.
|
|
|
|
|
|
|
|
|
|